In this Article we are gonna handle any possible Networking Problem in any Linux Distribution. I’m gonna use Vmware Virtual Machine, but the Problems are same as Physical Computer. The main topic is ifconfig and ip commands.
Let’s say you bought a brand new Computer or wanna use Virtual Machine on your Computer or Laptop. You’ve done already Operation System Installation. You opened the Browser but you don’t have Internet Connection.
First Thing you do is writing
ping 8.8.8.8
connect: Network is unreachable
to check out if you can reach Google or ifconfig -a to check out the Network Interfaces. In this Article i’m gonna use ifconfig as well ip commands. ip command is new and more powerful than ifconfig, but for now 90% of world use ifconfig.
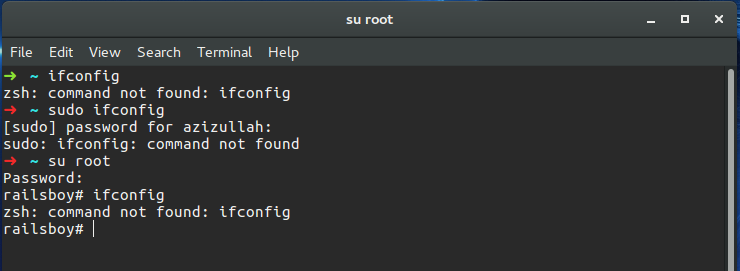
ifconfig not found?
Currently both Commands are preinstalled while Installation. But i’m not sure after which Version is preinstalled. Let’s say you wrote ifconfig, but there is an Error and ifconfig command could’t found. First thing you have to do is running the command with Admin Privilage called sudo, and it didn’t work as screenshot below. Either ifconfig didn’t installed or somebody played with Command(/bin).
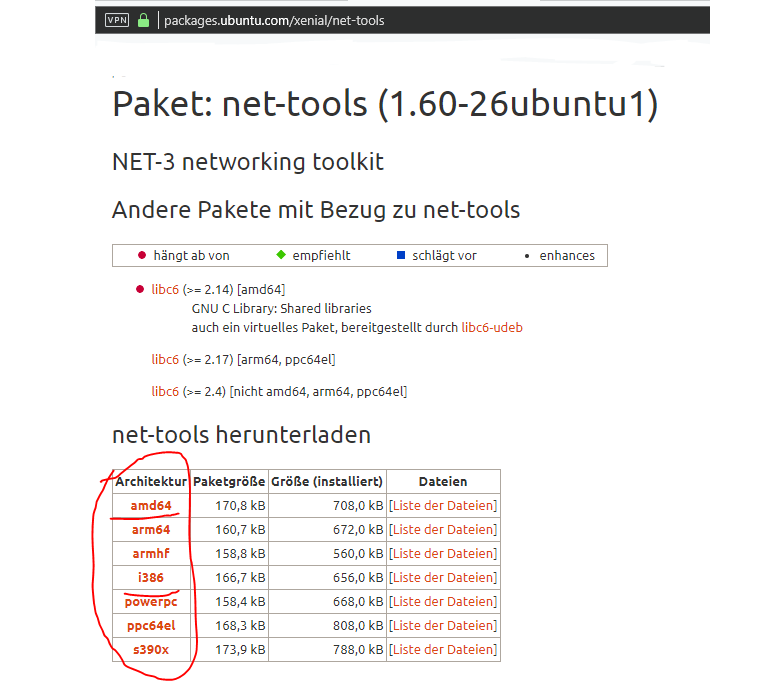
First seek it sudo apt-cache search net-tools, if there is no package called net-tools, than keep reading.
You can use now ip command. If you want to configure with ip go to Configure Network Intercafe with ip.
If you want to install ifconfig anyway. You have to install it in other Computer or anywhere else than move in Linux with USB-Stick or something else and install.
In Vmware you can use easly “Shared Folder” Future. Go VM>Settings>Options>Shared Folder>Always Enabled as in Screenshot below.
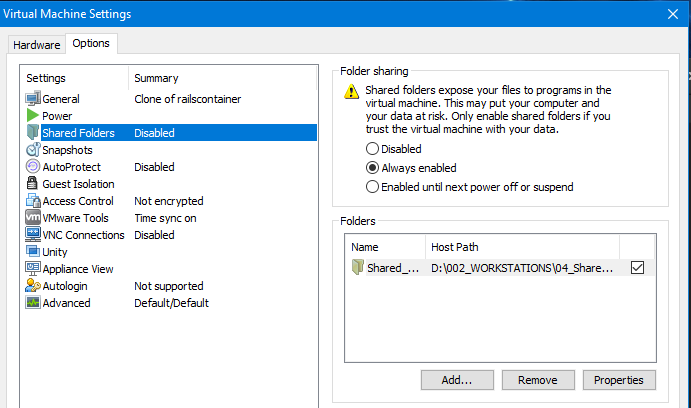
After enabling Shared Folder. Move the net-tool.deb File in Shared Folder. You can find it in Linux cd /mnt/hgfs/Your Share Folder Name/ than install with dpkg -i net-tools.deb command as Screenshot below.
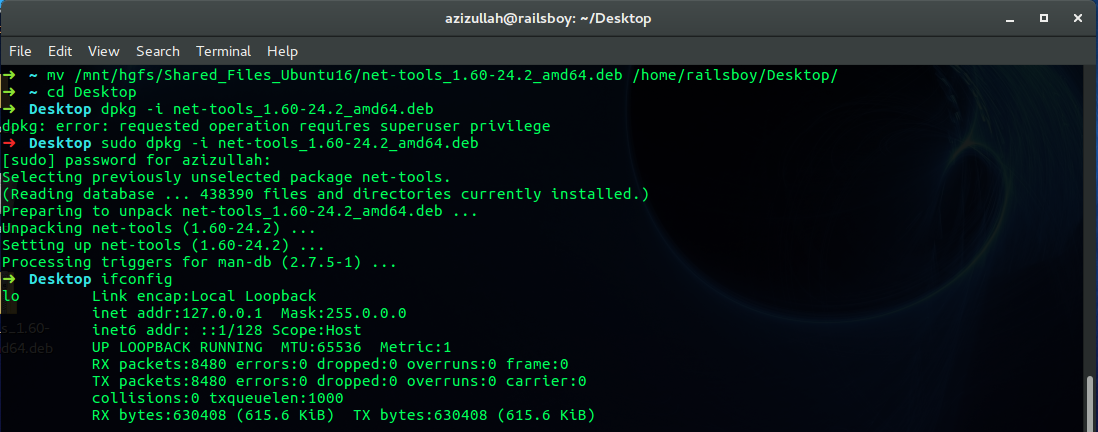
After installation, you can check out your Network Interface with ifconfig As you can see we have two Interfaces. One Interface is our Loopback (Localhost). It is used mainly for diagnostics and troubleshooting, and to connect to servers running on the local machine.
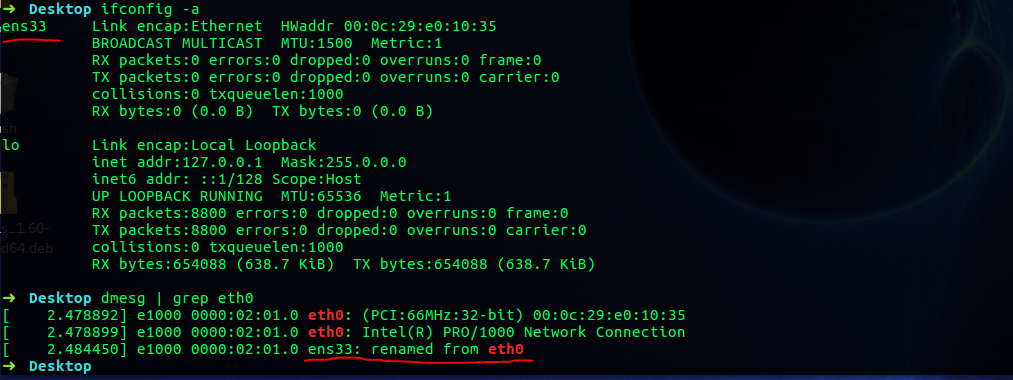
First one is ens33, which in Physical Computer “eth0” called. You can find “eth0” Interface with dmesg | grep eth0, you will see, that its renamed to “ens33”. Also “eth0” and “ens33” are same Interfaces.
Configure Network Interface with “ip” command
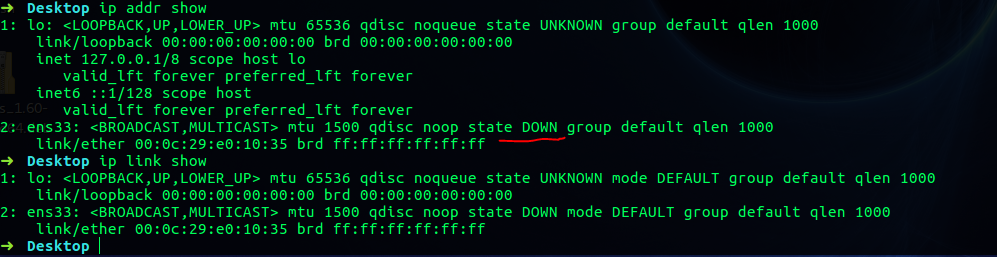
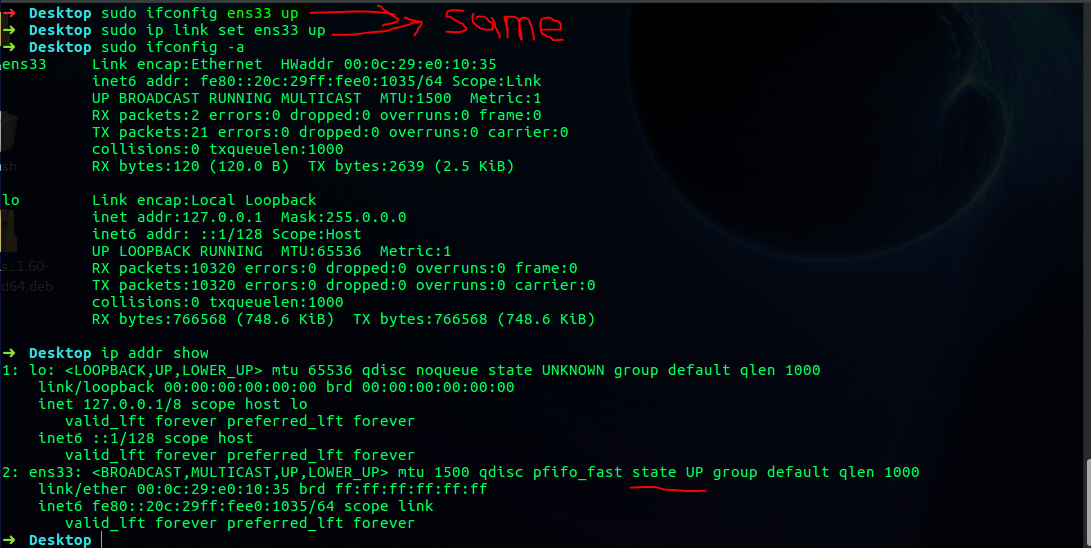
As you can see the Network Interface “ens33” is down. First we have to turn it up. I wrote both commands, but you can use just once.
Getting IP Address form DHCP
Now our Interface is up. But we don’t have an Identity respectively an IP Address(Internet Protocol).
So we have two ways to get an IP. First way an easy is gettin from DHCP(Dynamic Host Configuration Protocol). Second way is configuring manually. First we’ll see how to get IP from DHCP.

After this command you will be able to connect internet. DHCP will auto-configure Ip Address, Broadcast, Subnetmask and Standart Gateway. But if you want to setup everything manually keep reading 🙂
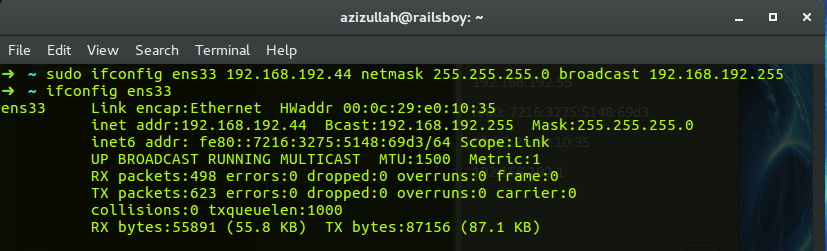
Setting up Network Interface manually – ifconfig
Just with a line code we can configure the IP, Broadcast and Subnetmask Adresses.
Broadcast
Broadcast is the last Host ID of Network. Every Pc on that Network has same Broadcast Address. Thats means, if I don’t now which Pc I wanna send data, so i send to Broadcast, which means every PC on Network.
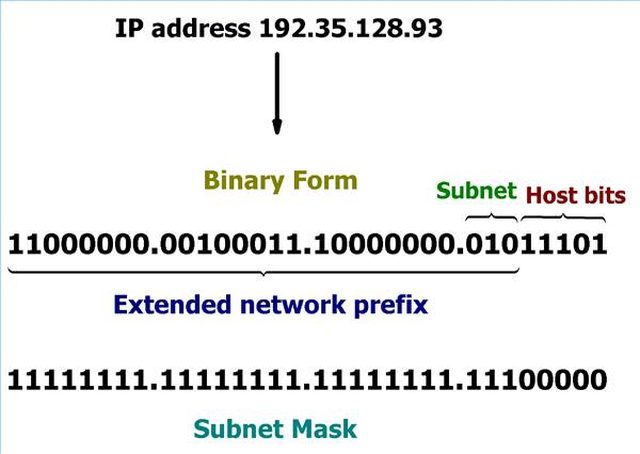
Subnetmask
With Subnetmask we are defining the Netz-ID and Host-ID on Network. I’m gonna post an Article about this. In our case we have 255.255.255.0. So we can use maximum 254 Host ID. First IP Address(192.168.192.0) is Netz-ID last IP Address is Broadcast(192.168.192.255).
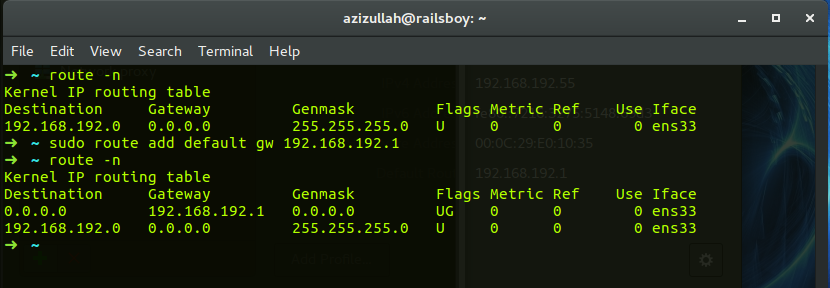
If you already trying to connect to Internet, you cant 🙂 Because we didn’t define Standart Gateway and set up the DNS(Domain Name System) yet. Lets define our Standart Gateway, which means our Router. Router(NAT) convert your Private IP to Public IP and let you communicate with other Networks. I will write an Article about it later.
If you try to connect to internet, now you can. But when you open your Browser and try to surf, you can’t 🙂 Because we didn’t set DNS Nameserver.
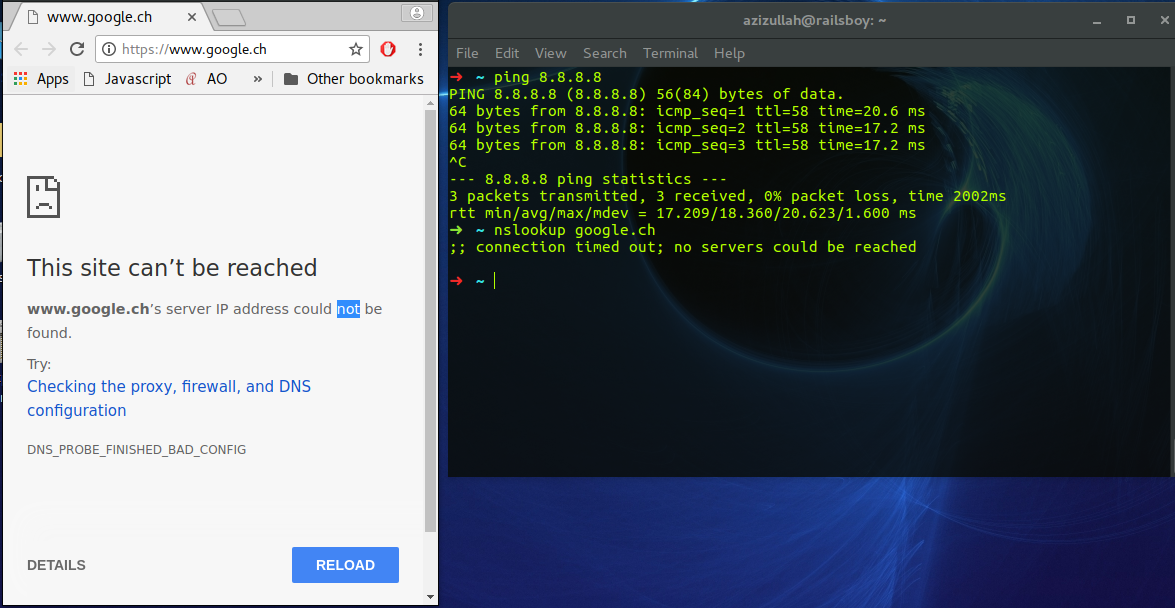
It means if you write in URL “google.ch” Computer doesn’t understand it, Computer just now the digits, which means IP Address of google.ch. DNS converts the IP addresses to domain names. So in this case “google.ch” => “172.217.18.163”. Lets set this up and finally surf in Internet. Write vi /etc/resolv.conf and write nameserver of Google
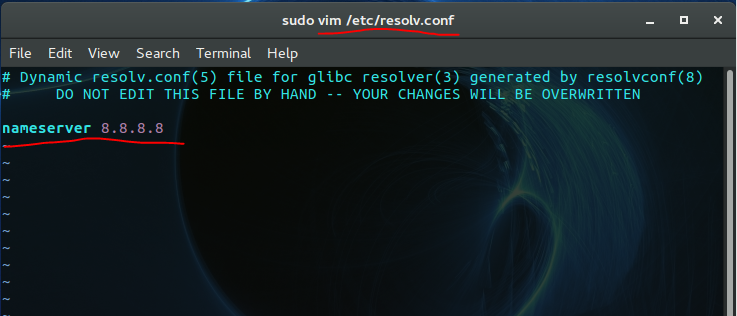
Now we can finally open the Browser and surf in Internet.

Setting up Network Interface manually – ip
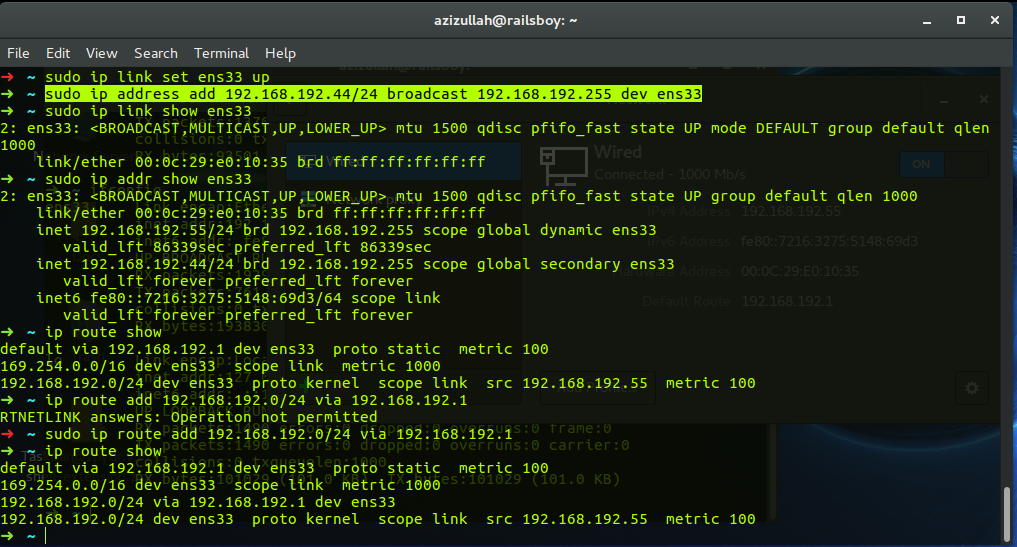
As you can see with much fewer Line codes we can configure our Network Interface. You just have set Nameserver and you are able to surf in internet.
Question
How can we add the address of the router that brings us internet to our network ?