Today we are gonna learn how to install hMailServer on Windows Server 2012 R2. First, we install and configure hMailServer on Windows Server 2012 R2, then we test it with Thunderbird Mail Client.
📦Requirements
📧What is hMailServer?
It supports the most common e-mail protocols:
- IMAP = Port 143 (TCP-UDP)
- SMTP = Port 25 (TCP)
- POP3 = Port 110 (TCP)
Any webmail system that supports IMAP and SMTP can be used with hMailServer. RoundCube and SquirrelMail are popular webmail systems that are often used with hMailServer. In an upcoming article I will connect the hMailServer with the Roundcube Webmailer. hMailServer can be used for free in most commercial scenarios.
📥Install hMailServer on Windows Server 2012 R2
You can simply download the hMailServer on its website. But before you install hMailServer, you need to install at .NET Framework 3.5. Its already exists with Windows Server 2012 R2, but some users do not know how to install .NET Framework. That’s why we first look at how to install .NET Framework 3.5 on Windows Server 2012 R2.
Install .NET Framework 3.5 Feature on Windows Server 2012 R2
There are two ways to install the .NET Framework. The first way is to download and install .NET Framework 3.5 from the official Microsoft website. The second way (the easiest way) you just have to have the installation file (.iso) with you.
- Insert the installation medium into the drive. If you have a virtual machine, you can put the .iso file in the CD-ROM.
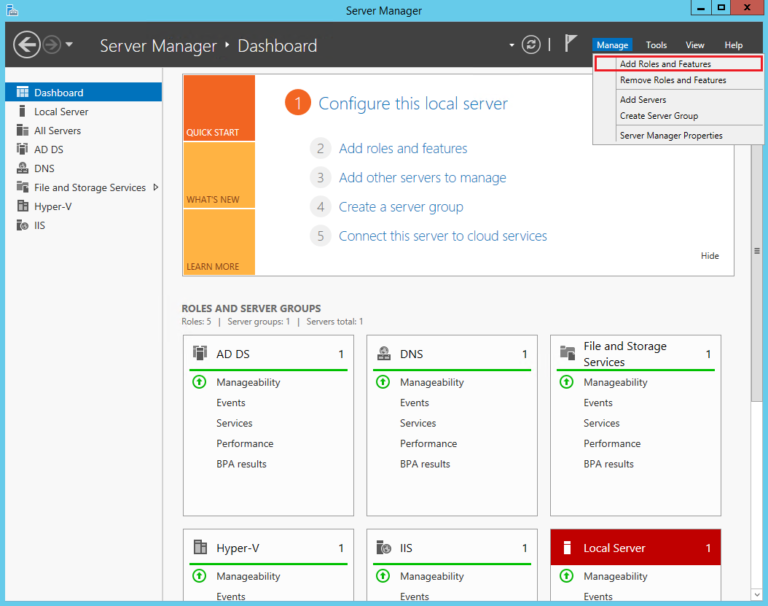
- Open the Server Manager, top right and click “Add Roles and Features”.
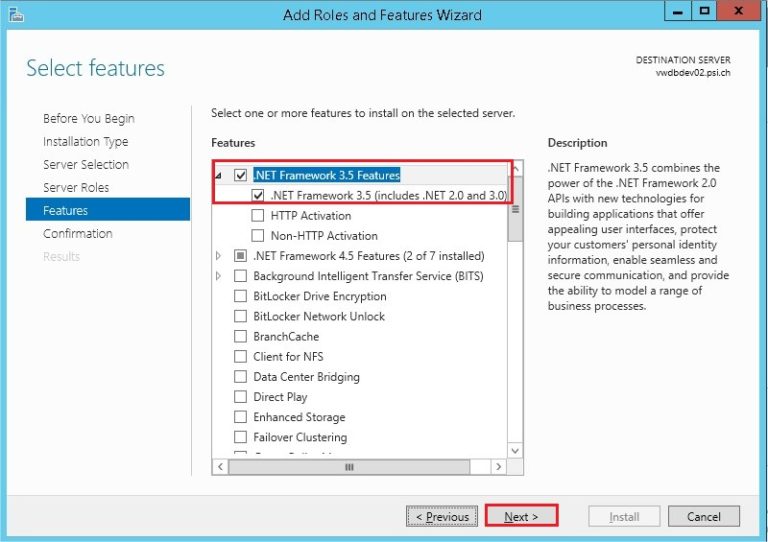
- Press Next until the Features Menu.
- Select the .NET Framework Feature and click Next.
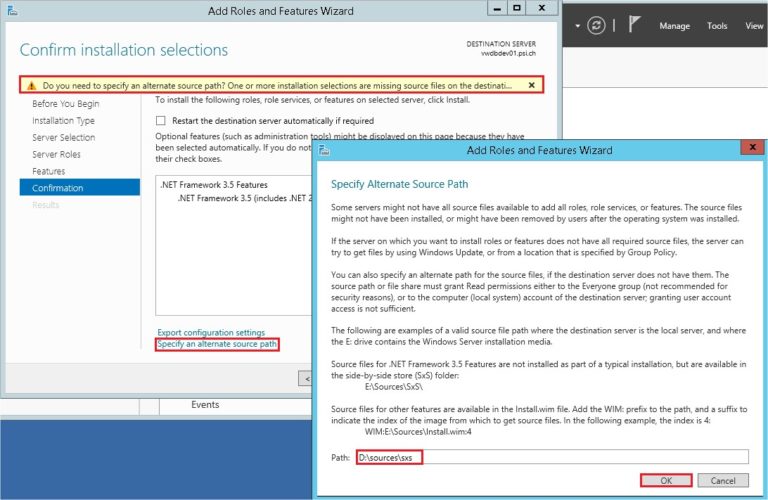
- However, before you click on “Install”, select “Specify an alternate Source Path”.
- Write
D:sourcessxs(D: is my CD-ROM) - Now click on “Install”.
Setup hMailServer
After you install .NET Framework 3.5, you can setup hMailServer.
- During installation you will be asked if you want to use an internal database (Microsoft SQL Compact) or external database (Mysql, Postgresql, Mssql).
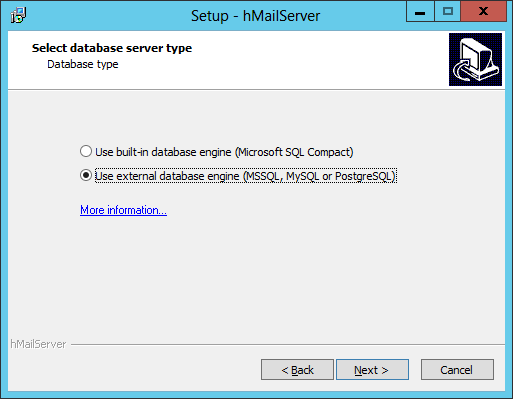
- Internal databases are easy to use and you do not have to set anything.
- External databases need to be customized. I’m using an external database because it’s more compatible with other programs (like Bacula). You can certainly choose an internal database. You can simply enter your desired password and complete the installation.
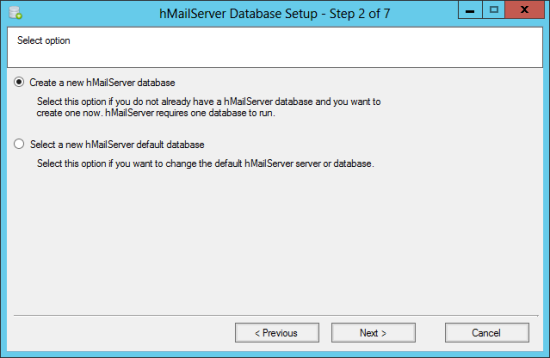
- I’ll show you, how to configure with external Database. Select “Create a new hMailServer Database”.
Database Configuration – Mssql
- Now you have three options. I show you Mssql and Mysql because they are the most used(for me:).
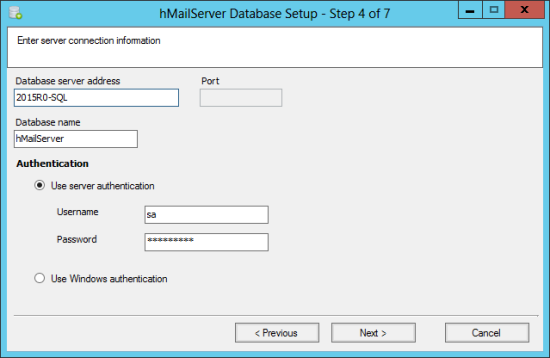
- If you choose MSSQL, you simply have to enter the server name and the name of the database. You can either enter the authentication yourself or use the same login as the Windows user. Here you choose “Use Windows authentication”. You do not need a service for this database. Press Next and complete the installation.
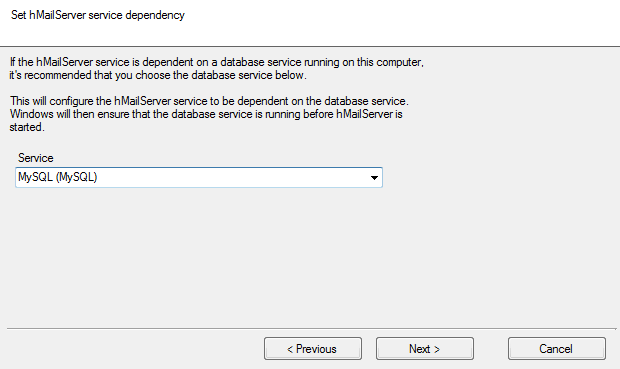
Database Configuration – MySQL/MariaDB
Mysql/MariaDB databases are most commonly used by web servers. You can use it to synchronize the database or create backups with Bacula.
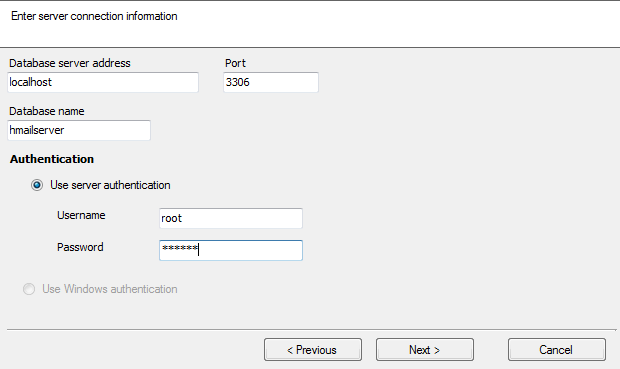
- Enter “localhost” if the database is on the same server.
- Mysql port is 3306.
- Enter the name of the database.
- Authentication is the same as what you choose during the MySQL installation. You can definitely create a new user for this database by using the mysql terminal or phpmyadmin.
- As a service, select “MySQL” so Windows knows where to authenticate. If you didn’t install Mysql yet, you can download it on official Mysql Page.
- Press Next and complete the installation.
Tipp
If after installing Mysql you still don’t see MySQL in the service list, download the following libmysql.dll file and paste it into “c:/Program Files (x86)/hMailserver/Bin”. After a restart, the MySQL option should be visible in the list.
hMailServer – Create Domain
To create a domain you should run a DNS (Domain Name System) server on a Windows server. About DNS I will publish an additional article later. That’s why I’ll just show you how to enter the domain into the hMailServer.
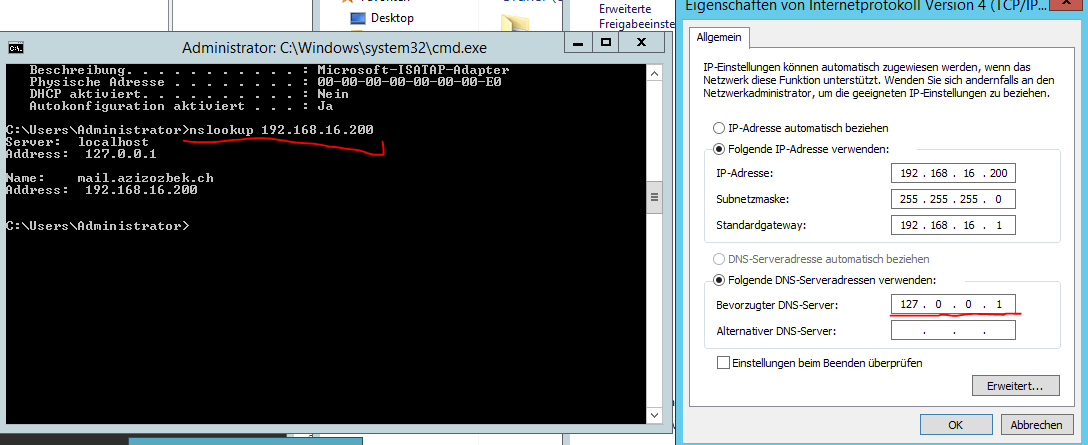
After setting the DNS Server, you should get a result like the following picture.
Check your own IP Address, if there is a DNS entry, cause it is a Local Server and the DNS Server is located on the same server(in this case), the Preferred DNS server: 127.0.0.1 (Loopback IP) should be.
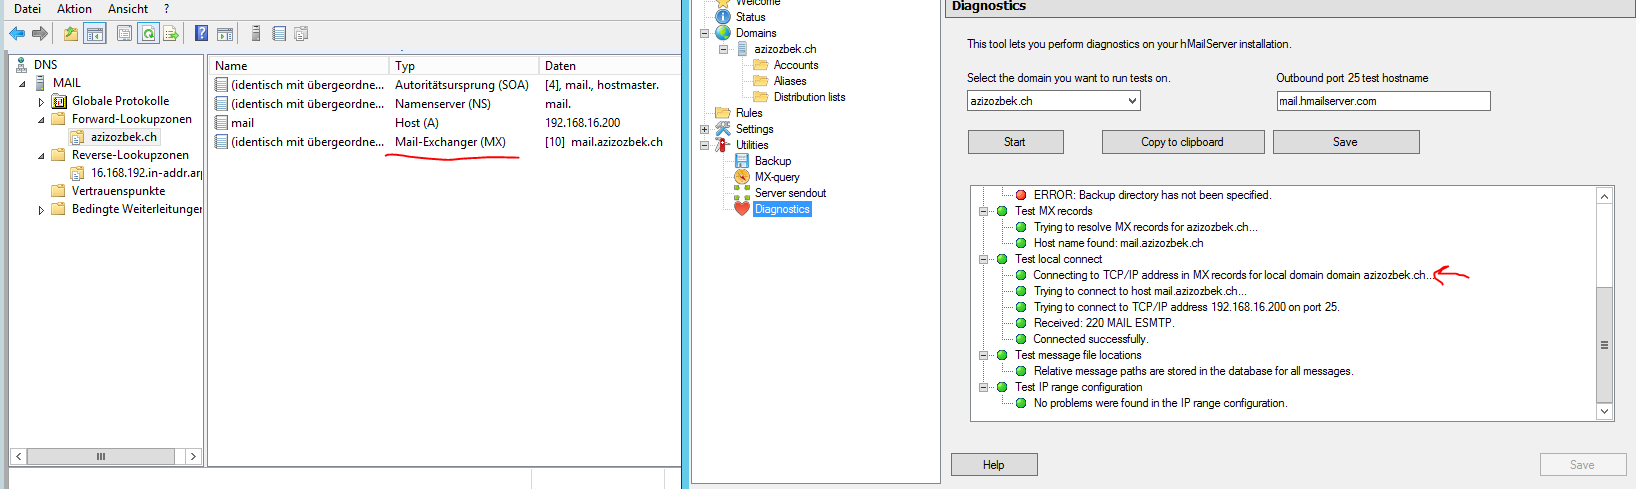
Now we control the DNS entries in the hMailServer. Only the MX Entry is relevant for us.
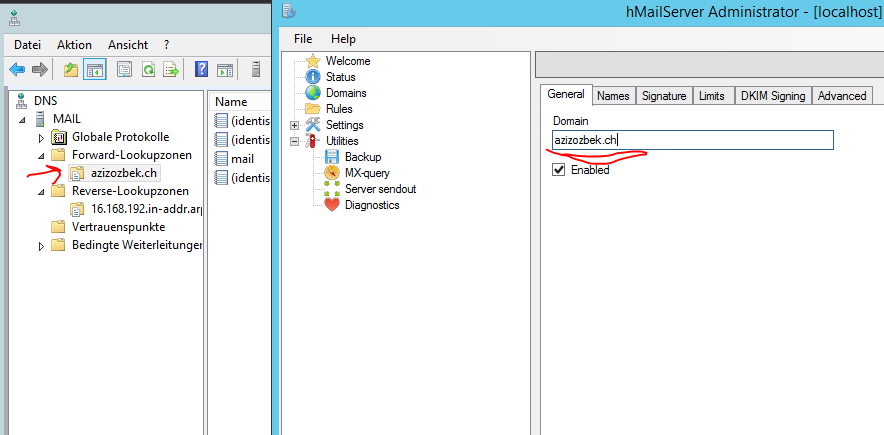
If everything is alright, you can now create your domain. The primary forward lookup zone name and the domain name must be identical.
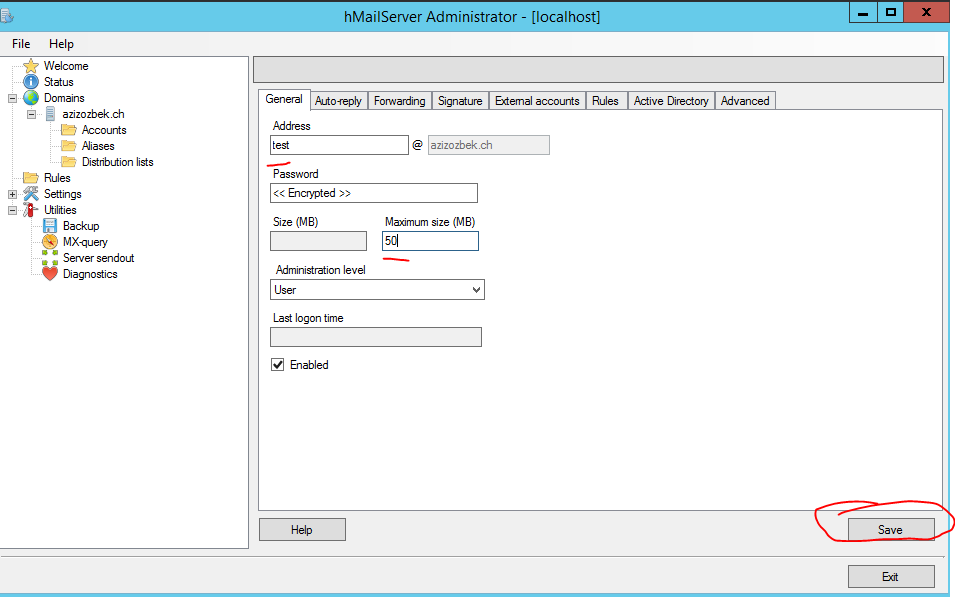
hMailServer – Creating Accounts
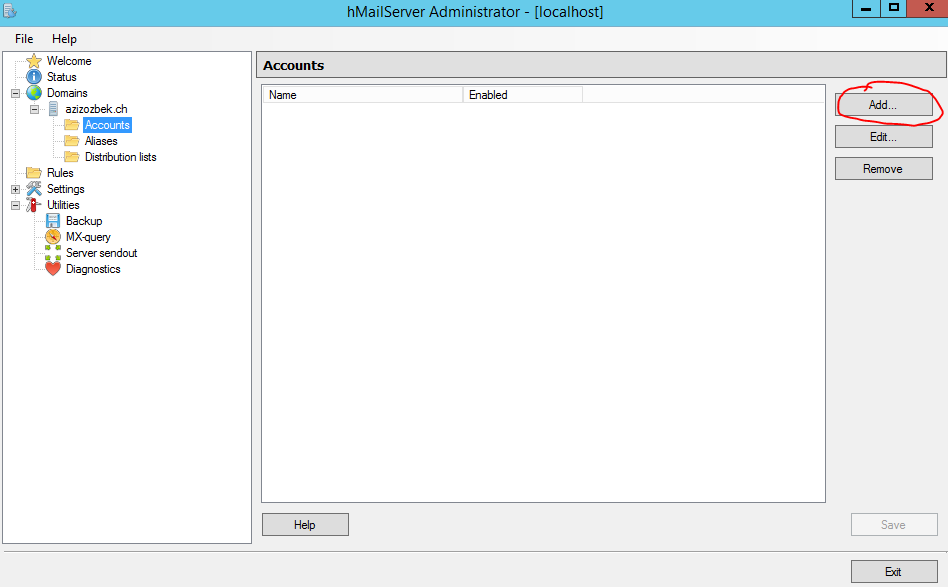
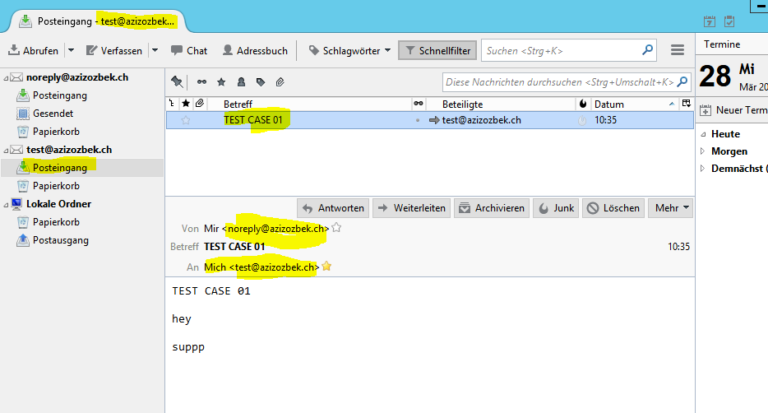
Just enter the username and memory limit. Other settings are recommended, but in this case we do not need anything. Look at them anyway, e.g. You can set the user to log in with the Active Directory account. I’ll create two sample Account, to check out with Thunderbird.
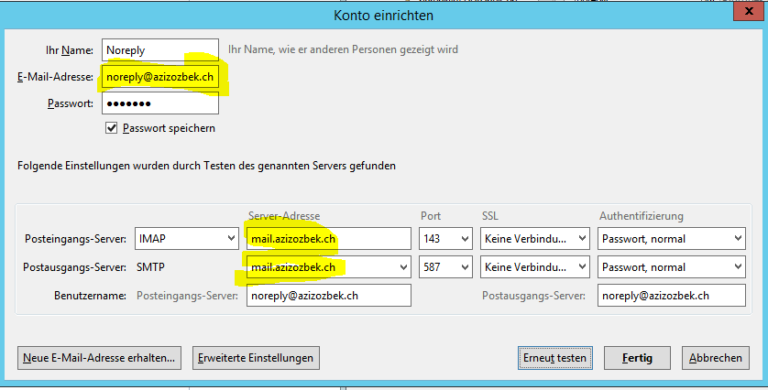
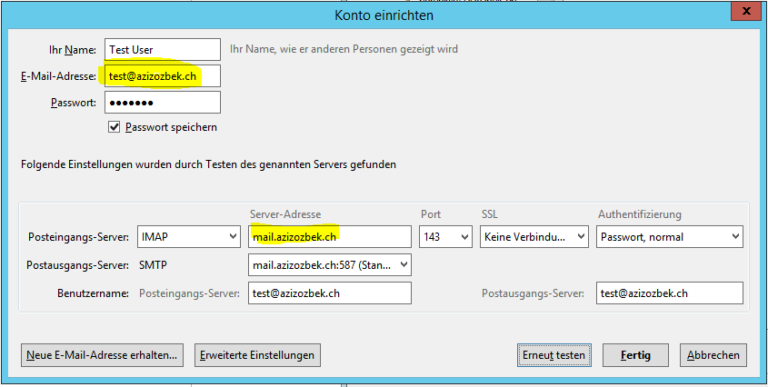
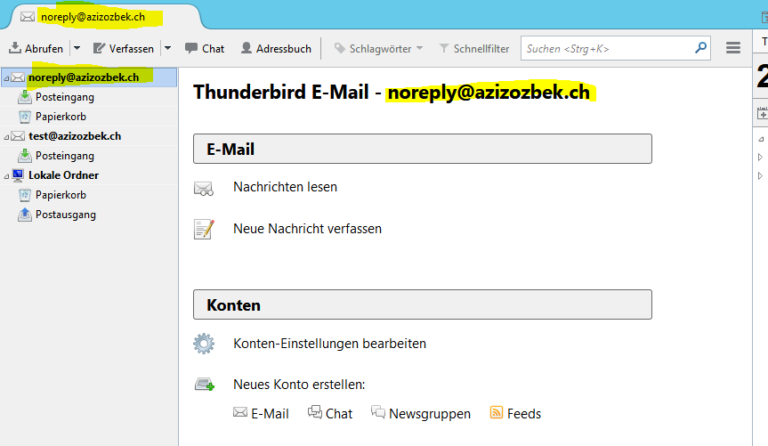
Thunderbird – Setup Email Account
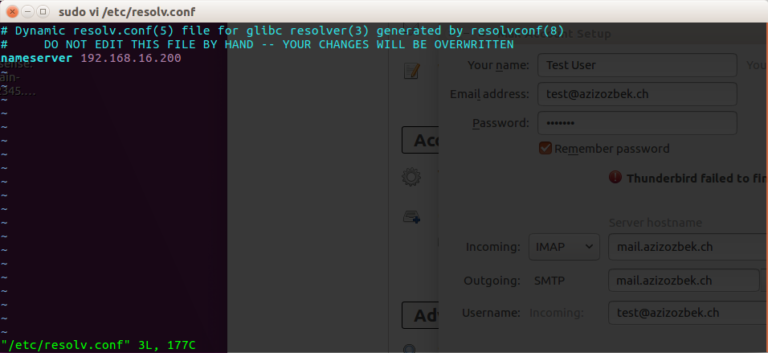
I am creating both accounts on Windows because I have not yet installed the Linux OS. You must pay attention to /etc/resolv.conf if you want to set up Thunderbird on Linux.


That’s actually all about the install hMailServer on Windows Server 2012 R2.
If you get an error, let me know 🙂
Using hmail server I can I send mails externally
Yes you can. But nowadays the authentifications got stricted, that’s why it probably lands in spam folder.