First of all, if you use a standard Home-Router, it has probably one Network Card and Wlan Adapter. That means you don’t have to configure Router(just use User Interface and give the Clients Routers IP), that’s why you can read first Article “🖧Connecting two Networks with Router“.
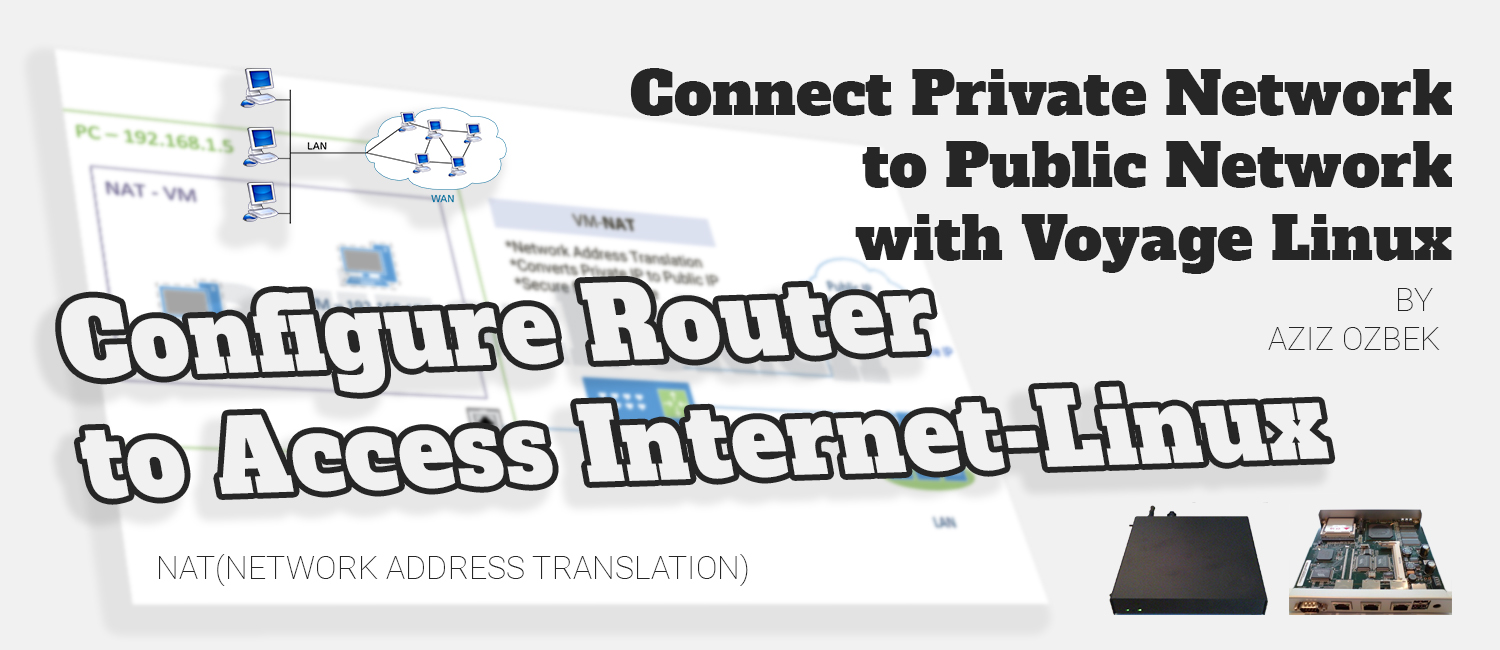
Last time we saw in Article “Vmware Network Connections Types – Graphical Samples” the Connection Types. Of course we can use those Connection Types physical network components. In this Article we are gonna see how to be secure in your own LAN(Local Area Network) with using NAT(Network Access Translation).
🛠Requirements to Configure Router
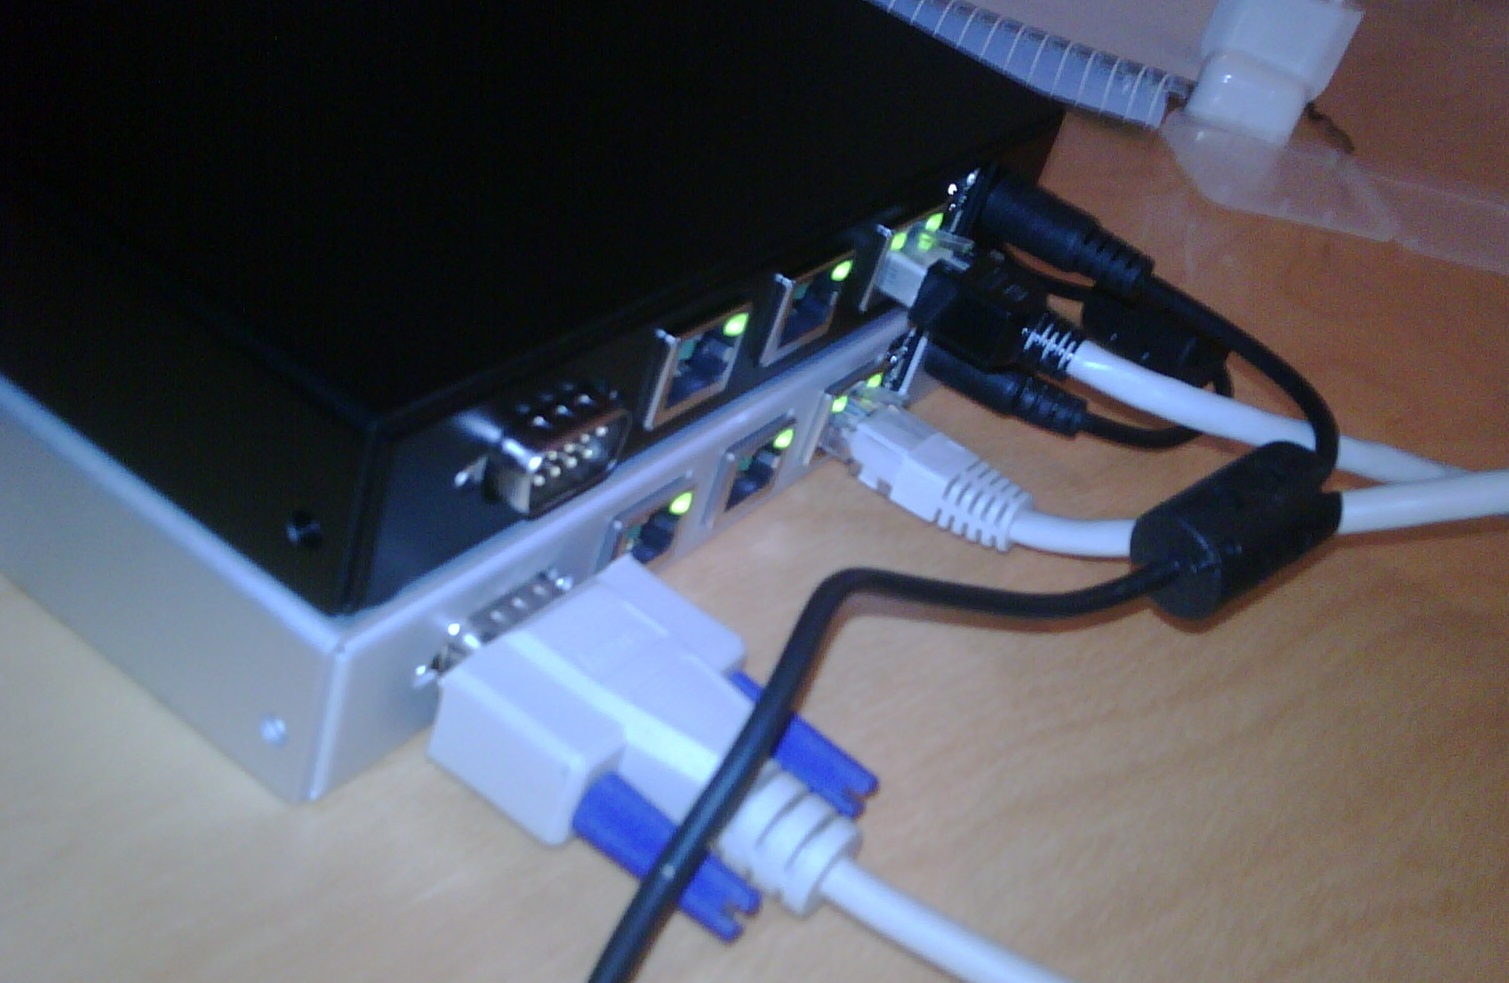
- A Router with minimum two Network Cards(I have a Alix – PC Engine
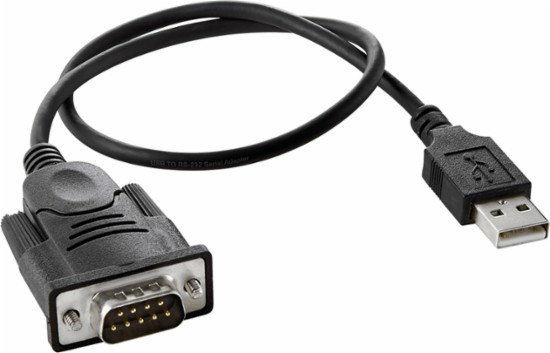
) - Cause Serial Port Sockets are enough old, you need a USB Serial Cable Adapter.(After configuring one Network Interface, we can connect with SSH)
In my case, i wanted to have more privacy at my workplace 🙂 So how we can stay secure against Sniffing Attacks and still surf on the Internet? Of course with using NAT(Network Address Translation). The Idea is exactly the same when you create a Virtual Machine and use it with NAT Adapter.👇
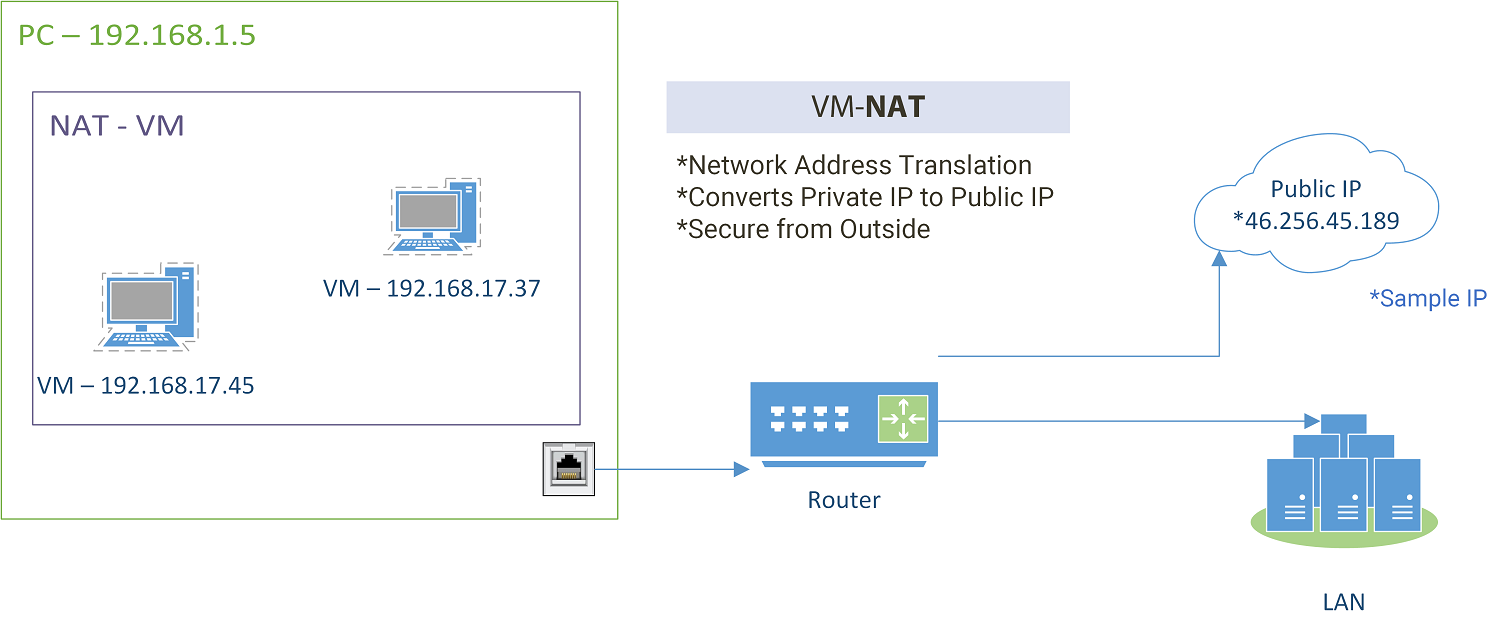
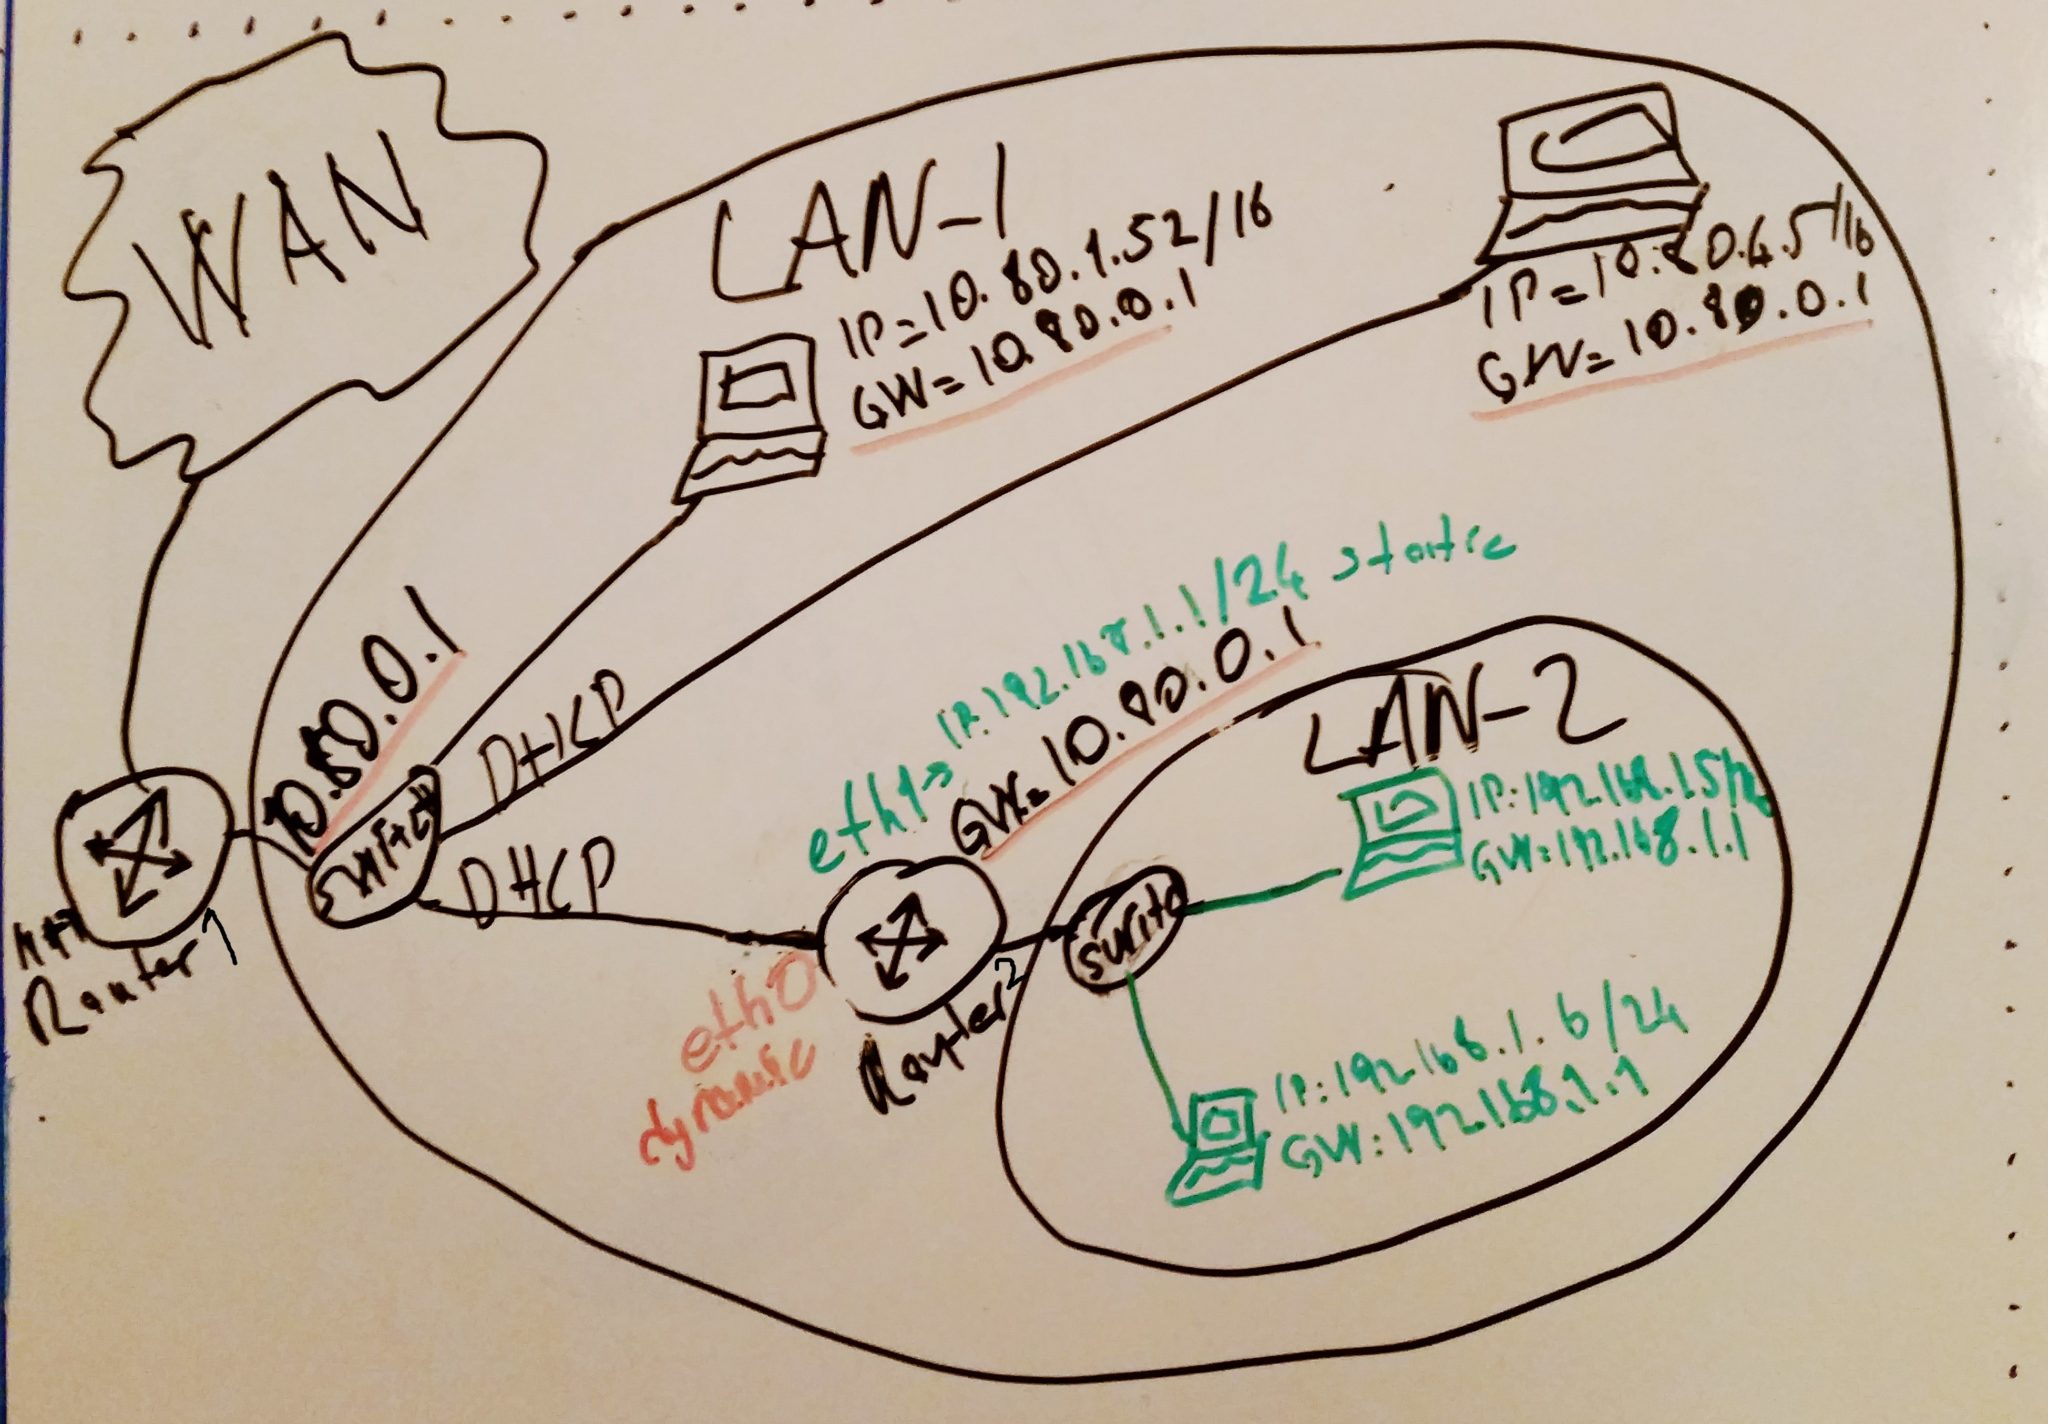
In our case the purple Rectangle(NAT-VM) is our second Router. So that means the green Rectangle gets Internet from blue Router, blue Router connected to WAN(Wide Area Network). I should have drawn in purple rectangle additionally a Router, which we are gonna use.
Configure Router with Serial Cable
You can use Putty to configure the Router either with Serial Cable nor with SSH. As well as on Windows or Linux. Cause we didn’t set the IP of Router yet, we have to connect with Serial Cable first.
- Connect your Router with USB Serial Adapter
- Open Putty >Connection > Serial
- Serial line depents on which USB Port you are using, if you don’t know, just test out “COM1, COM2, COM3, COM4”
- On the Router there should be a Serial Speed, for my router it is “34800”
If you don’t have Internet Connection and you didn’t install Putty yet, you can use in Linux cu ,screen, minicom and tip Commands to Connect USB-Port.
cu -l /dev/device -s baud-rate-speed // how to use command
cu -l /dev/ttyUSB0 -s 38400
screen /dev/ttyUSB0 38400
minicom // Settings on own User Interface
tip -19200 ttyUSB0
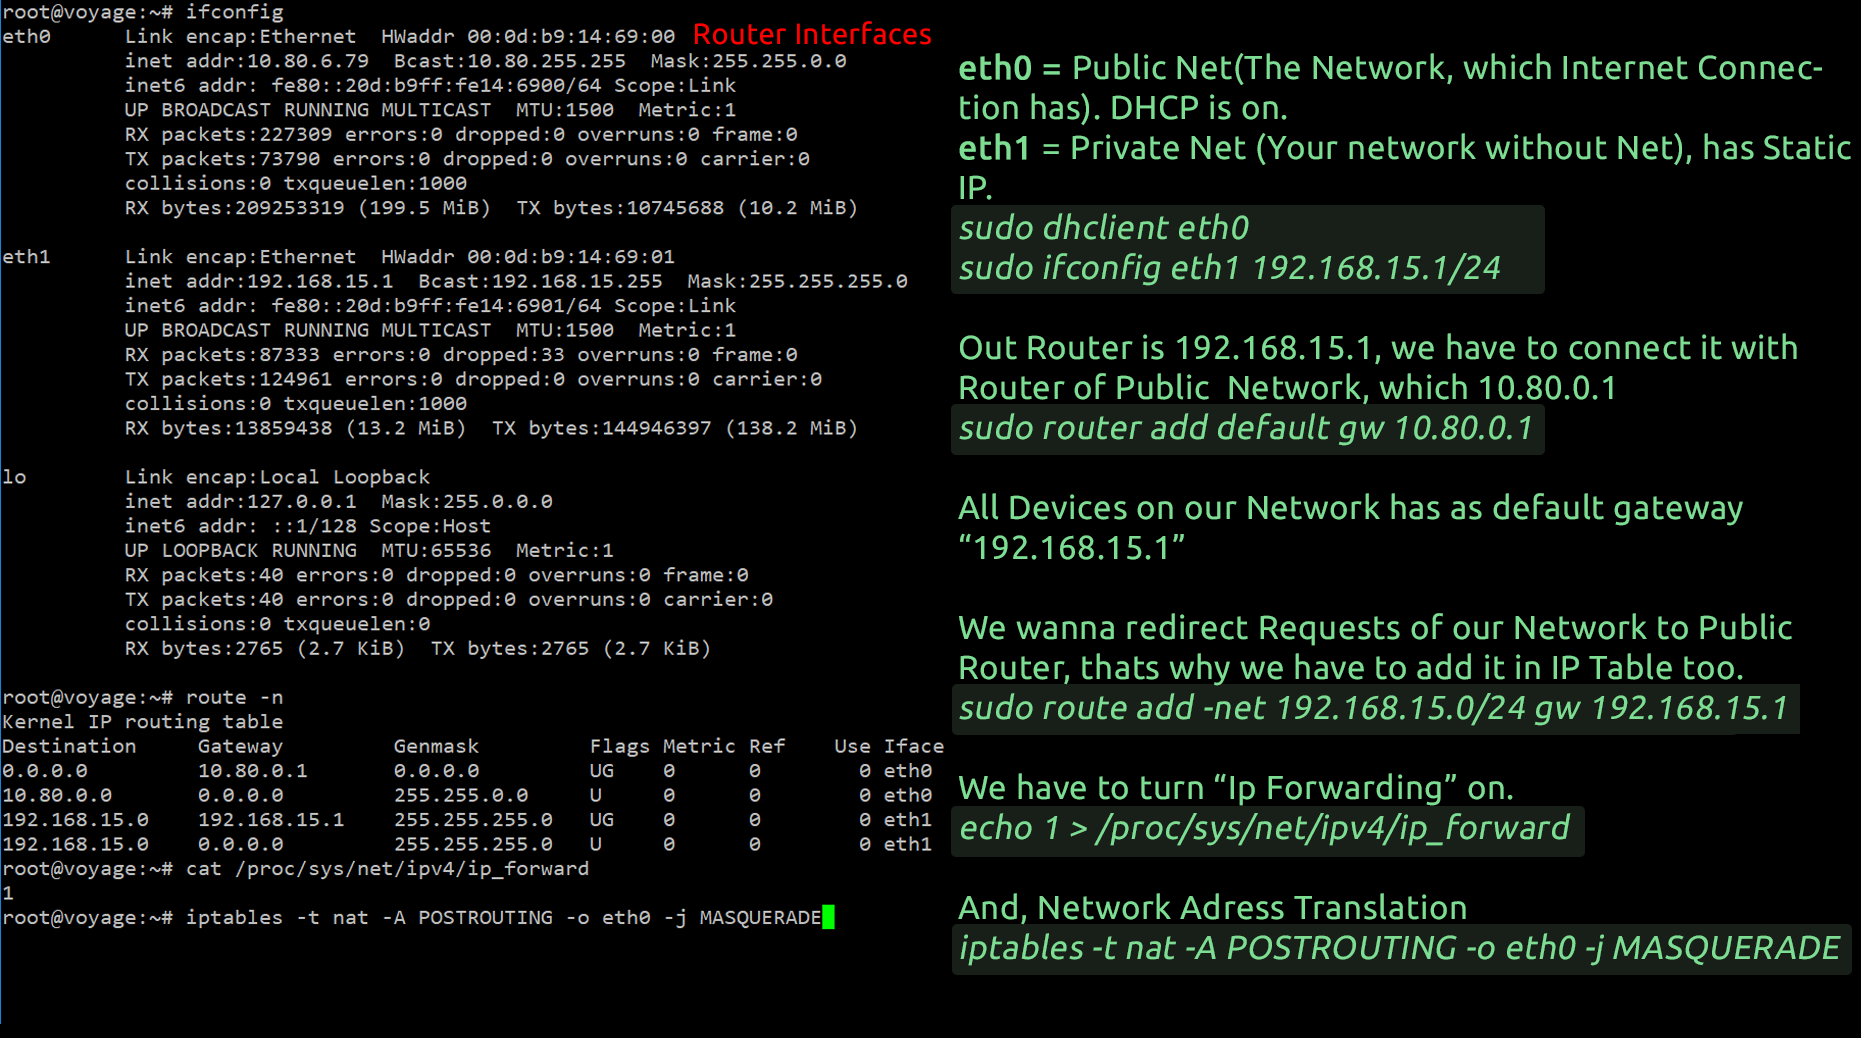
In purple Router we have minimum two Network Card. Let’s say eth0 and eth1. We connect the eth0 with blue Router and eth1 to our Computer(Or Switch).
If you can’t configure the blue Router, to set for purple Router a static IP, you have to get from blue Router a Dynamic IP, so there will be no conflict.
Configuring eth0;
sudo dhclient eth0
With dhclient we will get from DHCP Server of out Network. But you have to write this code everytime when you start your Device. That’s why we do it permanently.
$ sudo vi /etc/network/interfaces
  auto eth0
  auto eth1
  iface eth0 inet dhcp
You can leave the Vi Editor with ESC to return visual mode, than Shift + .(colon), and enter to save wq, without save q!.
auto eth0 and auto eth1 = So everytime we start the Computer, the Interfaces will be UP
iface eth0 inet dhcp = So everytime eth0 Interface sends to DHCP Server a Request to get Dynamic IP Address.
Configuring eth1;
Because in our Network there must be one static Default Gateway Address, we have to set eth1 manual.
$ sudo vi /etc/network/interfaces
iface eth1 inet static
  address 192.168.1.1 //Standart Gateway for our Network Clients
  netmask 255.255.255.0
  network 192.168.1.0
  broadcast 192.168.1.255
💢Possible Errors
- If you get an error, that you can not change the Interfaces File, check out if you have Admin Privilege.
- If it doesn’t work, check the authorization of file with
ls -la /etc/network/interfaces - If root has no right to change, write
chmod 700 /etc/network/interfaces - If you are using Voyage Linux, check out if you have the write permission
mount - ro = Read Only, rw = Read Write
- if its “ro” you have write
remountrwto make “rw” writable.
Finally you can restart your Network with sudo /etc/init.d/networking restart
You can use following codes to configure the Interface in Terminal, but not permanently;
sudo ifconfig eth1 192.168.1.1/24 // ifconfig command
sudo ip address add 192.168.1.1/24 broadcast 192.168.1.255 dev eth1 // ip command
Now, congrats. Your Router has an IP Address. That means you can ping your Router from your Computer. ping 192.168.1.1, if it doesn’t work, first control the Cable. And of course you have to be in the same Network as purple Router. (That means Subnetmask and Network ID’s must be same). To set these, you can use exact same code, which you used for Router.
sudo vi /etc/network/interfaces // this is your Computer
iface eth0 inet static // this is your Computer's Network Card, it might be has different name
  address 192.168.1.2
  netmask 255.255.255.0
  network 192.168.1.0
  broadcast 192.168.1.255
  gateway 192.168.1.1 // Router IP, Default Gateway
Restart your Network with sudo /etc/init.d/networking restart
If you use Windows, its much easier.👇
Now you have to be able to ping Router. So far our Router is just a Client of Network yet.
Configure Router with🛡SSH (Secure Shell)
Now you can connect to Router with SSH. You don’t need Serial Cable anymore, if you borrowed it 🙂
Open Putty > Choose SSH > Write IP Address of Router (Default Gateway) > Port 22 > Connect
If you don’t have Putty, you can connect with ssh Command.
ssh 192.168.1.1 // simply connect
ssh [email protected] // connection with username
📅Configure Routing Table
Now we are gonna give Router its Task. It has to bring us Internet, but nobody from outside shouldn’t reach us.
First of all check out the Default Gateway with netstat -rn or route -n. In Windows cmd.exe>route print
Let’s set Default Gateway. I tried to draw how it works(awful sketch). We are configuring Router 2. To connect with Router 1(and Internet Connection), we have to set as Default Gateway = Router 1(10.80.0.1)
sudo route add default gateway 10.80.0.1
Now we should have Internet Connection. We can not ping a domain name(google.com) and check out if we can reach Google (Standard Procedure to check if we have Internet Connection), cause we didn’t configure the DNS yet. For now just ping Google ping 8.8.8.8.
Now we have Internet Connection just on Router. Clients can’t connect outside yet. With adding Default Gateway we said to Router “Hey if we want to reach any Address, go and ask Router 1, it knows, where we go”. Now we have to say to our Router “Hey if anyone from our secure Local Area(eth1) has a Request, forward it to Standard Gateway(eth0)”. To do this;
sudo route add -net 192.168.1.0/24 gw 10.80.0.1 // to forward any Request from Secure LAN to out LAN
Now the Router knows what it has to do. But we have to change some default. By default the IP Forwarding is always 0. We are gonna change it to 1, to active it.
echo 1 > /proc/sys/net/ipv4/ip_forward
vi /etc/sysctl.conf // to change permanently
   net.ipv4.ip_forward = 1
After enabling IP Forwarding, we should configure the NAT(Network Address Translation)
iptables -t nat -A POSTROUTING -o eth0 -j MASQUERADE
iptables: the command line utility that we use to configure the kernel
-t Select NAT at the “nat” table to run NAT.
-a POSTROUTING Insert a rule in the POSTROUTING chain (-A stands for “append”).
-o eth0 We want packets that leave the router at the second network interface “eth1” (-o for “output”)
-j MASQUERADE to mask, so the router should set its own address as the source address.
If you get the following iptable error:
iptables v1.4.12: can't initialize iptables table `filter': Table does not exist (do you need to insmod?
Most likely you should update your kernel .
sudo apt-get install linux-image-$(uname -r)
Every Client in secure LAN has to have as Default Gateway = 192.168.1.1 to connect with Router 1.
Now you can ping someone in out LAN ping 10.80.1.5 or Google ping 8.8.8.8
To surfing with Browser you can add for second DNS, 8.8.8.8.
//Linux
vi /etc/resolv.conf
  nameserver 8.8.8.8
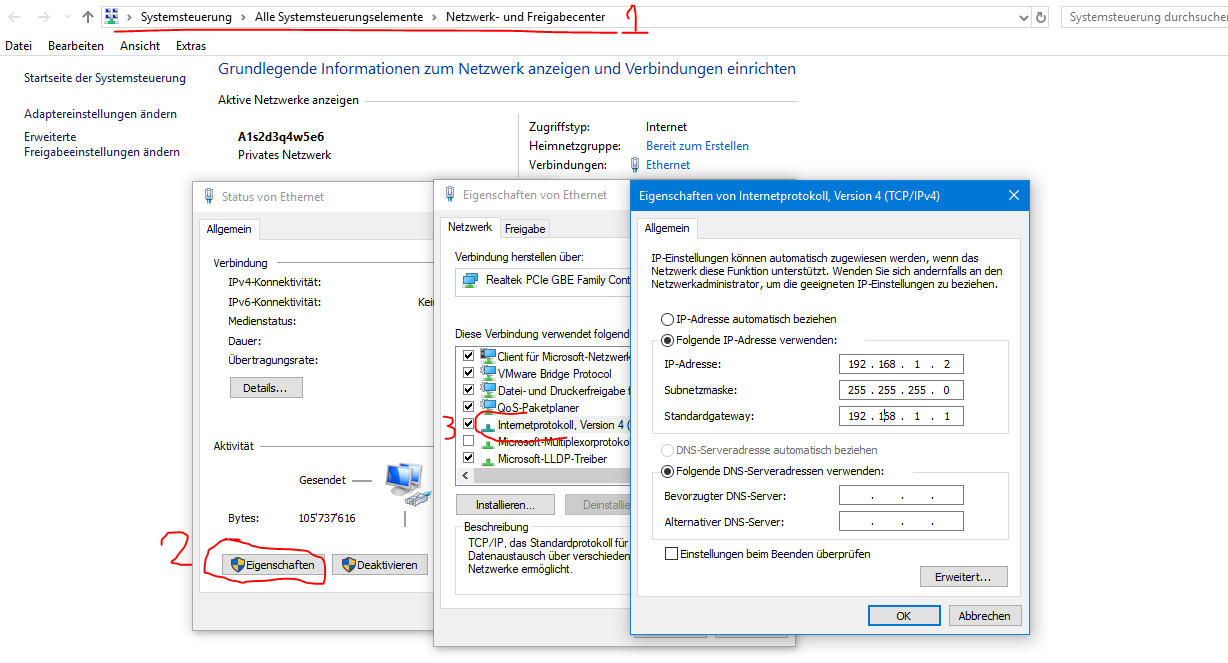
For Windows you can change it like Img.4-Windows Ip Configuration👆
That was so far everything 🙂 I learned the basic Information about how to Configure Router and wanted to share with you. If you get any funny error let me know it.
Question
Can you write every “ifconfig” Commands with “ip” Commands ?
Possible Questions for this Article:
How can i configure Voyage Router?, How to create a secure LAN with NAT, How to enable Router Ip Forwarding?, How to add Standard Gateway?, How to set Linux iptables Postrouting ?