In this article “Ubuntu MRTG installation SNMP devices monitoring” we’ll learn more about MRTG (Multi Router Traffic Grapher) and SNMP (Simple Network Management Protocol). I’ll install MRTG on Ubuntu 16.04, but the process on both Ubuntu 12.04 and Ubuntu 14.04 as well as other Debian-based Linux distributions is the same. I will enable SNMP on Windows Server 2012 R2, but you can enable this service on any network device, that offers an SNMP service (for example, switch, router, etc.)
📈MRTG – Multi Router Traffic Grapher
MRTG is coded by Tobi Oetiker, so it is also called Tobi Oetiker’s MRTG. MRTG monitors SNMP network devices and draws graphics, which show how much traffic passes through each network interface. It helps especially when something goes wrong in the network. With MRTG, you can monitor the network traffic at any time and detect errors easily.
SNMP – Simple Network Management Protocol
SNMP Simple Network Management Protocol is a network protocol that monitors and controls network devices such as routers, switches, firewalls, printers, or NAS appliances. SNMP was gradually expanded.
The version SNMP v3 supports not only authentication, but also encryption of the transmitted data.
SNMPv1
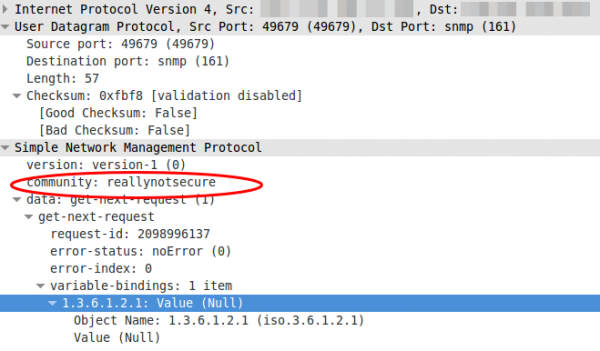
The main problem of SNMP Version1 is the insufficient security during transmission. One of the problems is the unencrypted transmission of the password, so it can be easily sniffed and used by unauthorized parties. We will be using SNMPv1 together on Windows Server 2012 R2 because Windows Server 2012 R2 does not support the other versions. You can analyze this vulnerability with Wireshark.
SNMPv2
There are 3 different versions, of which only SNMPv2c has been used. The other two are SNMPv2p (Party-Based SNMP) and SNMPv2u (User-Based SNMP).
SNMPv2c uses a community string as “authentication”. Here, the name of the community is included in every request. The community is stored on the devices and determines what permissions a request from this group has. However, inquiries with the wrong community are still possible. Thus, this method can not be considered very safe.
SNMPv3
SNMPv3 is a security model that establishes an authentication strategy for a user and the group in which the user resides. Security Level is the allowed security level within a security model. A combination of a security model and a security level determines which security mechanism is used when handling an SNMP packet. So, both authentication and encryption are used.
Active SNMP on Window Server 2012 R2
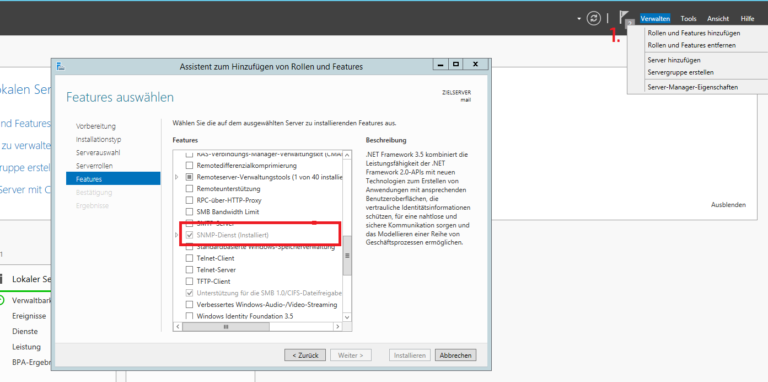
- First we install the SNMP service feature.
- Manage> Add roles and feature
- Until the features selection click “Next”
- Click SNMP Service and Install.
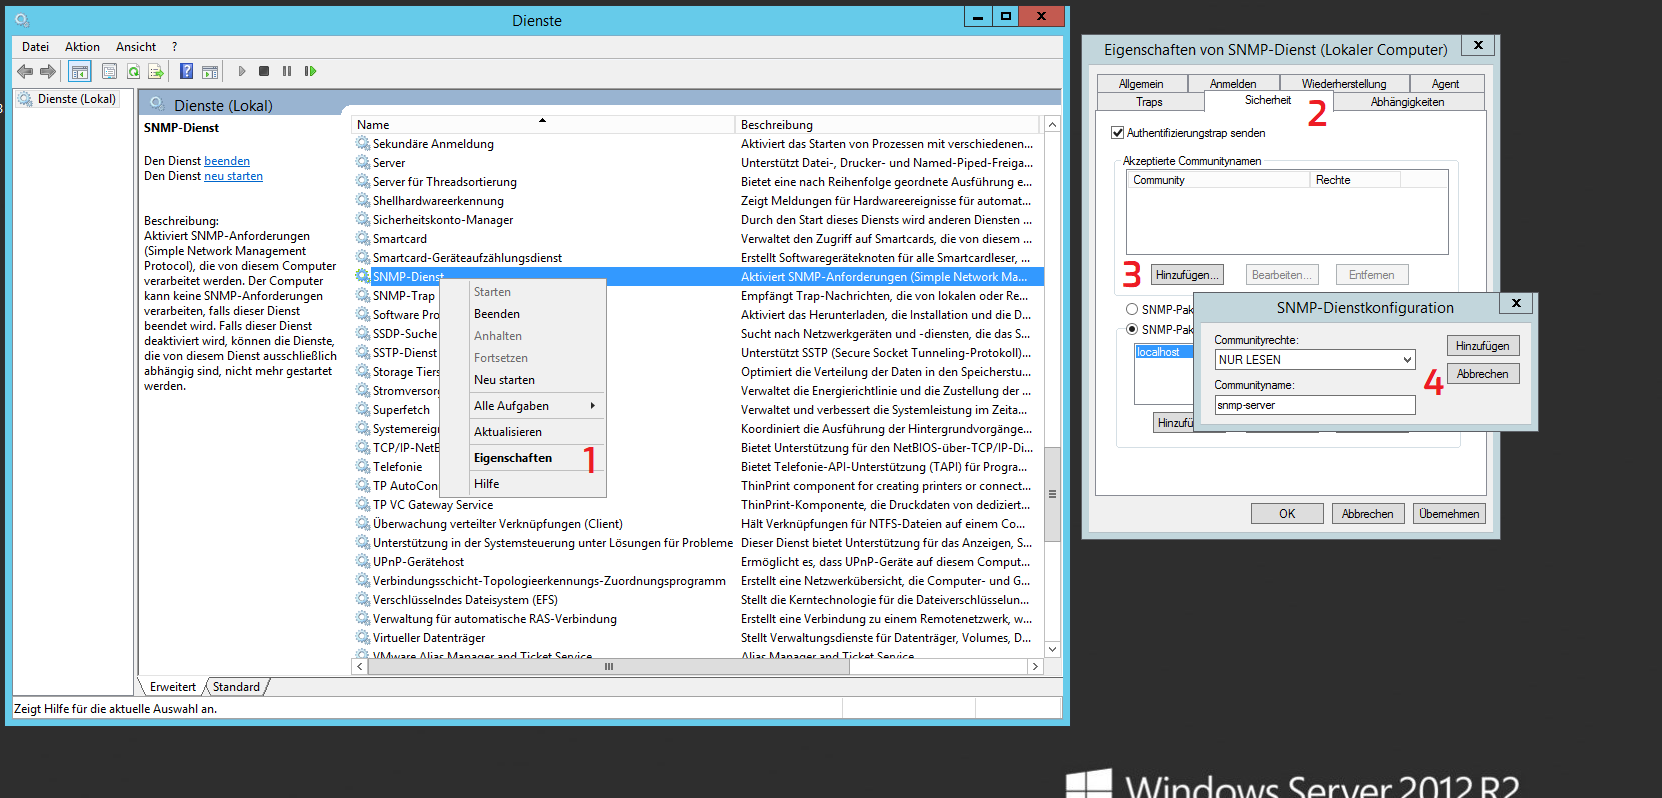
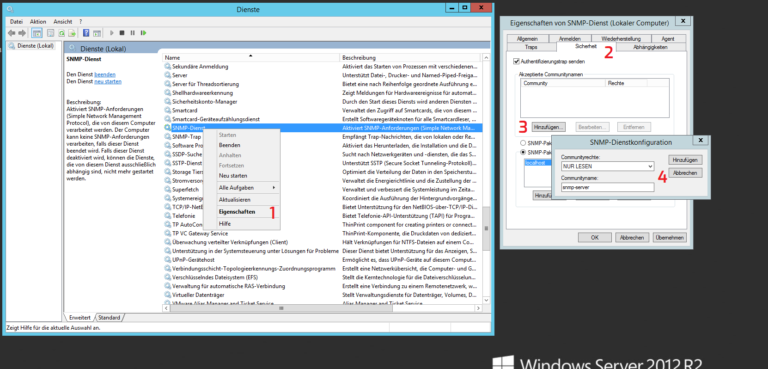
- Services> SNMP Services Right Click> Properties
- Security> Accepted Community Names> Add> Community Name
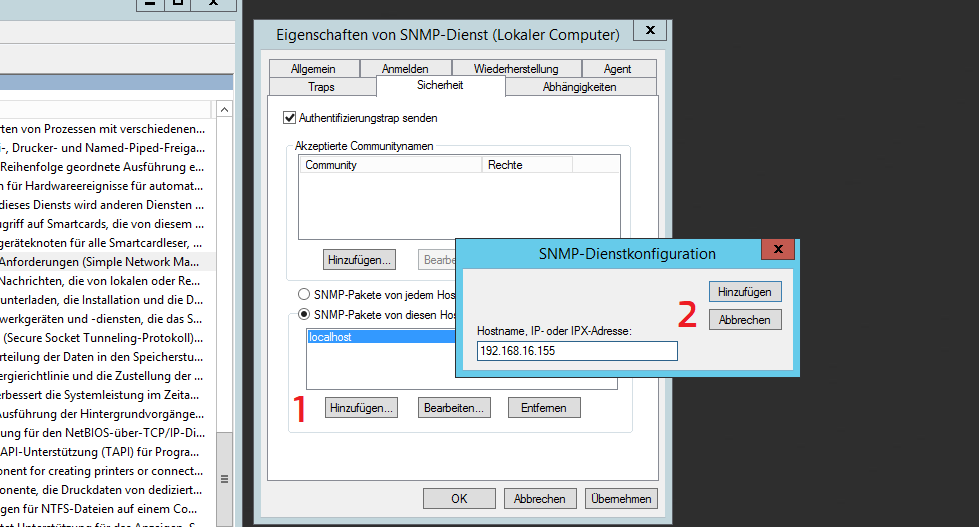
- SNMP packets from this host accept> IP of the Ubuntu client

Previous
Next
Install MRTG on Ubuntu 16.04 LTS
📥System Update – Install MRTG
First, you should update and upgrade your system so that you can eliminate it from possible sources of error, if any occur at all 🙂
sudo apt update -y
sudo apt upgrade -y
sudo apt-get install mrtg
🛠Configuration
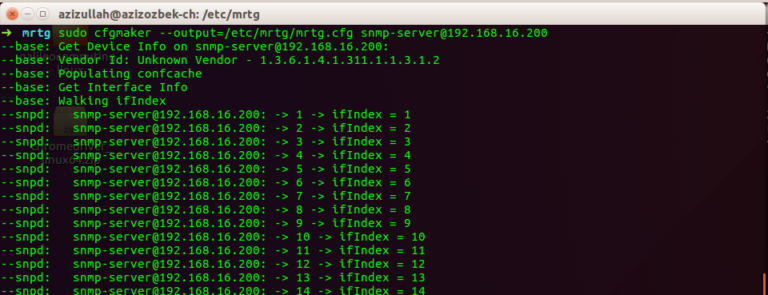
Create a folder and move the configuration file. Then create a configmaker that gets information from the Windows server.
sudo mkdir /etc/mrtg && sudo mv /etc/mrtg.cfg /etc/mrtg/
sudo cfgmaker --output=/etc/mrtg/mrtg.cfg [email protected]
If you can not connect to the server, make sure the Ubuntu IP is allowed on the Windows server.

Previous
Next
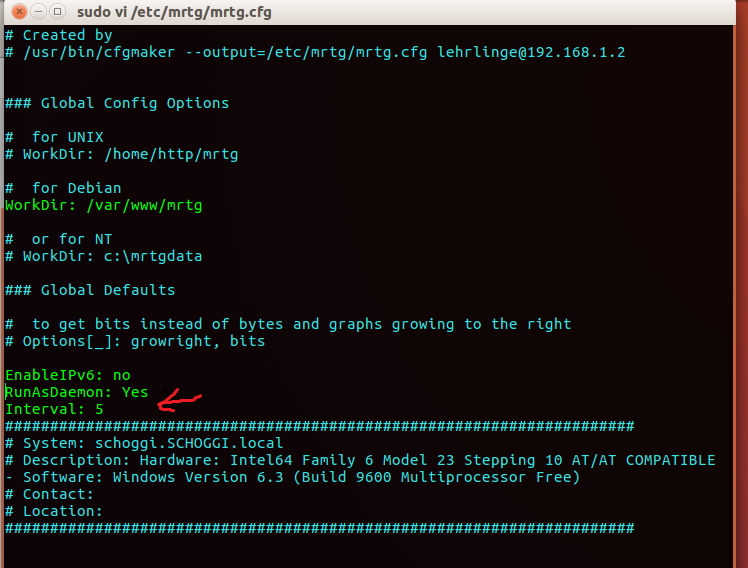
To run Mrtg as a daemon, write this down the configuration file. This way, MRTG will get information from the SNMP device every 5 minutes.
RunAsDaemon: Yes
Interval: 5
🖥Install Webserver – Apache
You should set up a web server in the local network to use MRTG. You can either install Ngix or Apache. I choose Apache.
To install this, use the following commands..
sudo apt install apache2
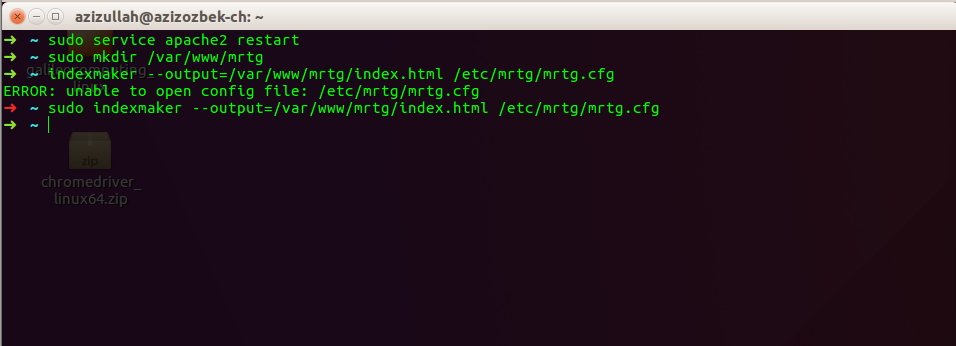
Then create a folder in the web server and an indexmaker that forwards the information that the MRTG daemon fetches from the SNMP device to the html page.
sudo mkdir /var/www/mrtg
sudo indexmaker --output=/var/www/mrtg/index.html /etc/mrtg/mrtg.cfg
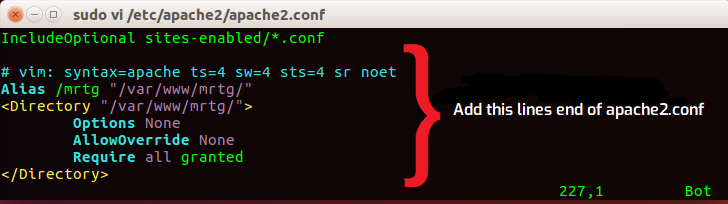
Open /etc/apache2/apache2.conf and paste the following lines into the section that contains similar directory directives:
Alias /mrtg "/var/www/mrtg/"
<Directory "/var/www/mrtg/">
        Options None
        AllowOverride None
        Require all granted
</Directory>

Previous
Next
Lastly, change the environment language to C and restart Apache.
sudo env LANG=C /usr/bin/mrtg /etc/mrtg/mrtg.cfg
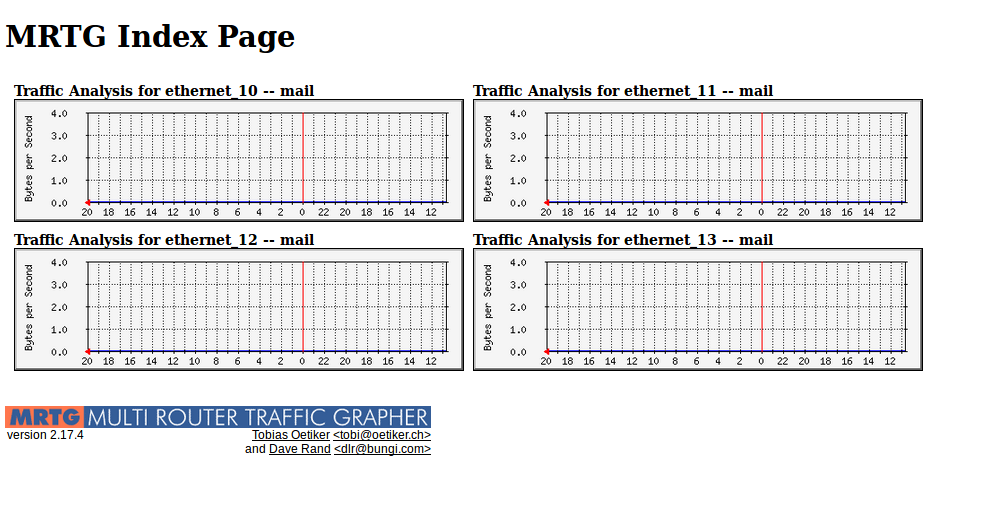
Now you can open a browser and visit localhost/mrtg. You should receive empty graphics, the information will be given after 5 minutes, because we have set this up.
📋Set MRTG as a Service up
You can set MRTG as Ubuntu service and the next time all you have to do will be just to start the service. Following script helps you for it. Source Icflatline.com.
- Create a file
sudo touch mrtg - Copy the following script into the file.
sudo gedit mrtg - Give permission to file
chmod +x mrtg - Move to the runlevel directory
sudo mv mrtg /etc/init.d/ - Update Services
update-rc.d mrtg defaults - Reload Systemctl
systemctl daemon-reload - Start the service
service mrtg start
[amp-gist id=”14c003000405daea2f69f1233d49a679″]
That was all about Ubuntu MRTG installation SNMP devices Monitoring 🙂
If you get another weird mistake, let me know!