OsTicket is a PHP Script, that helps the Companies to contact easily with their customers. If a Customer has a Problem with something, he can just create a Ticket on OsTicket Platform to contact with Support Team of Company. In this Article we are gonna see how to install OsTicket on Ubuntu 12.04 to 16.04.
I will use Ubuntu 16.04, but i already installed it on Ubuntu 12.04, so i will just tell you guys, what kind of error could you get, while you are installing OsTicket 🙂
🛠System Update
First of all you should update and upgrade your System, so you can remove this from your possible errors list, if there will be an error 🙂
sudo apt update -y – sudo apt upgrade -y
If you are using less then 16.04 Version, you should write “apt-get“
🖥Installing Webserver – Apache
You should create a Webserver in Local Network Area to run PHP. You can install either Ngix or Apache. I will install Apache. To install it sudo apt install apache2
📦Packages – Requirements
OsTicket was coded on PHP (Hypertext Preprocessor) and uses various PHP-Modules. That’s why we neen PHP v5.4 or greater. OsTicket uses Mysql or Mariadb to save the Datas.
Requirements
- PHP v5.4 or greater
- MySQLi extension for PHP (Ubuntu 14.04 and grater): php-mysql
- Mysql-server or Mariadbserver
Recommend
- Gdlib Extension: php-gd
- PHP IMAP Extension — Required for mail fetching: php-imap
- PHP XML Extension (for XML API): php-xml
- PHP XML-DOM Extension (for HTML email processing): php-dom
- PHP JSON Extension (faster performance): php-json
- Mbstring Extension — recommended for all installations: php-mbstring
- Phar Extension — recommended for plugins and language packs: php-phar
- Intl Extension — recommended for improved localization: php-intl
- APCu Extension — (faster performance): php-apcu
- Zend OPcache Extension — (faster performance): php-opcache
How to Install all those Php Modules and Remember everytime?
As you can see you just have install PHP and one database server(and maybe for mailing imap). You should install the Recommendations too for good performance.
There are so many package and modules, how can you know all of them on each Version? I give you a Tip. As you can see the prefix of all modules are php-, so if you are using Ubuntu 16.04, you are probably using PHP7, that’s why you can write just “php” as a prefix. If you are using Ubuntu 12.04 or Ubuntu 16.04 you are probably php5, php5.5 or php5.6 🙂 So all you have to do is write the prefix php5.5- and Module Name.
PHP End of Life
Please be aware of installing a supported Version of PHP: http://php.net/supported-versions.php
How to Install OsTicket on Ubuntu 12.04 LTS
If there is “E: For package “libapache2-mod-php5″ there is no installation candidate” Problem. Install the PHP Repository first.
sudo add-apt-repository ppa:ondrej/php
sudo apt-get update
sudo apt-get install php5 libapache2-mod-php5 php5-imap mariadb-server
How to Install OsTicket on Ubuntu 14.04 LTS
If you are using php5.5 change prefix of following line with 5.5.
sudo add-apt-repository ppa:ondrej/php
sudo apt-get update
sudo apt-get install php5.6 libapache2-mod-php5.6 php5.6-imap php5-6-mbstring php5.6-mysql php5.6-gd mysql-server
How to Install OsTicket on Ubuntu 16.04 LTS
sudo add-apt-repository ppa:ondrej/php
sudo apt-get update
sudo apt-get install php7.2 php7.2-cli php7.2-common
sudo apt-get install php7.2-curl php7.2-gd php7.2-json php7.2-mbstring php7.2-intl php7.2-mysql php7.2-xml php7.2-zip
You can install on every Ubuntu Version a compact Server, such as AMPPS Server. When you install the Ampps; Mysql, Apache, Php (Php-Modules), Python, Perl, MongoDB will install automatically.
How to Install OsTicket on Windows
On Windows all you have to install AMPPS Server or WAMP Server or XAMPP Server. Than the Procedure is same as Ubuntu.
🗃Database Configuration
I’m gonna create Database and Tables with Terminal. You can do this on Windows with Command Prompt(cmd.exe). And of course you can use Phpmyadmin. But i recommend you to use Terminal, to get use the Commands. Open the Terminal with alt+T. If you installed the Mysql, that means you set the password, while installing mysql. If you installed the Mariadb, password is nothing(blank).
mysql -u root -p
create database osticketdb;
create user osticket@localhost identified by 'password';
grant all privileges on osticketdb.* to osticket@localhost identified by 'password';
flush privileges; mysql> exit;
📥Install and Configure OsTicket
After you installed Apache, there will be /var/www/html created. All we have to do on each Ubuntu Version, download the OsTicket and put in there. On Windows, If you are using Ampps: C:/ampps/www/, Wamp: C:/wamp/www (Default Places, if you changed use your path.
mkdir /var/www/html/osticket
cd /var/www/html/osticket
Since there is authentication for installing of Osticket we can’t download OsTicket with wget. Please install it on official website: https://osticket.com/download
sudo unzip osTicket-v1.10.zip // Name depends on Version.
sudo cp upload/include/ost-sampleconfig.php upload/include/ost-config.php
sudo cp -rv upload/* /var/www/html
sudo chown -R www-data:www-data /var/www/html/osticket
sudo /etc/init.d/apache2 restart
Now you can visit your Localhost. Open a Browser and go to 127.0.0.1/osticket or localhost/osticket.
💢Possible Errors
If there is a Blank Page. It is most likely “libapache-mod-php”. Try to reinstall it.
If there is 404 Not Found Error. It is most likely you changed the DocumentRoot. You can control it using sudo vi /etc/apache2/sites-enabled/000-default.conf. 12. Line should be DocumentRoot /var/www/html
If you get something else, let me know.
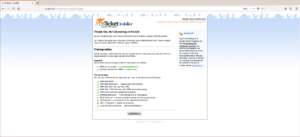
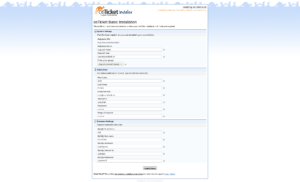
I show you the Installation with Screenshots, so you can see whats going on. After you installed the OsTicket, you should change the file permissions again using chmod 700 include/ost-config.php


